Scaling My Kubernetes DevOps Homelab (Part 1): Cost + Logistics
A practical, budget-friendly 3-node Kubernetes homelab build—focused strictly on cost and logistics (no cluster setup yet).
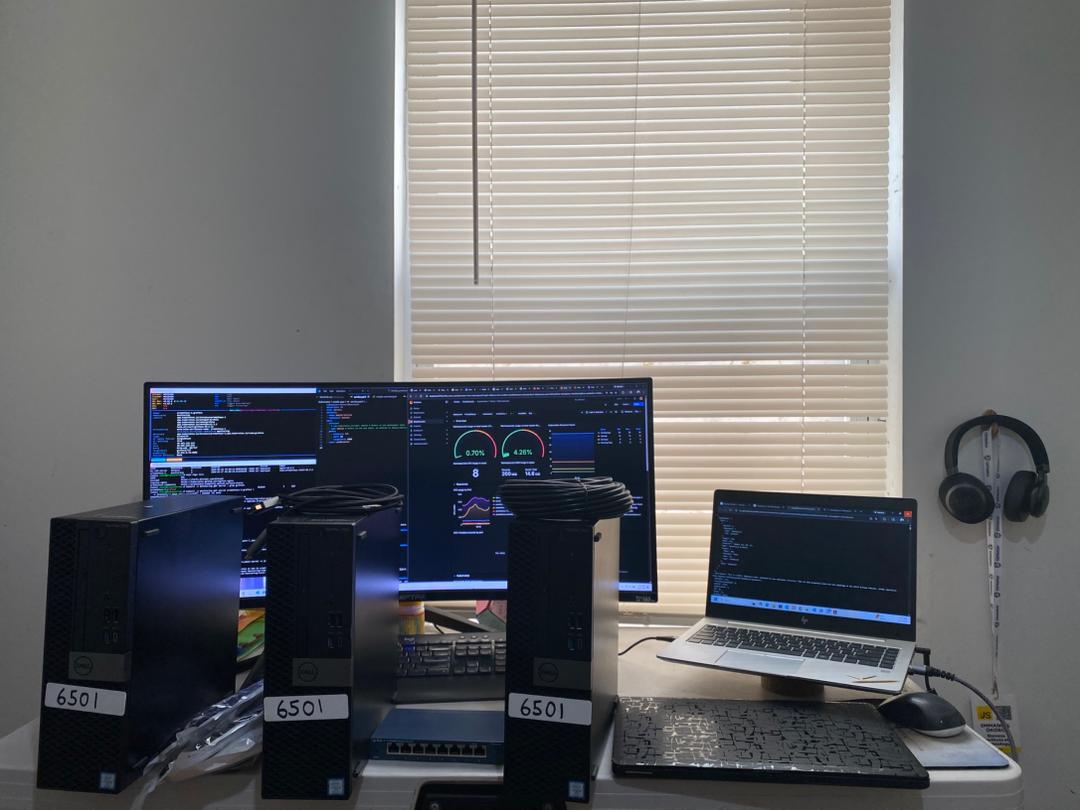
I’m expanding my homelab to practice production level DevOps, Platform, and Kubernetes workflows: cluster operations, networking, Helm, GitOps, observability, upgrades, failures, and recovery.
This first post covers cost and logistics only. No cluster setup, no manifests, no architecture debates. Just the practical foundation: what I bought, why I bought it, and how I’m organizing it.
Hardware
I picked up three Dell OptiPlex 7060 machines from an auction market at $105 each.
| Spec | Details |
|---|---|
| CPU | Intel Core i5-8500 (6 cores, 3.0GHz) |
| RAM | 16GB DDR4 (upgrading to 32GB later) |
| Storage | 256GB NVMe SSD |
| Form factor | Small Form Factor (SFF) |
| Cost per node | $105 |
Why this class of machine?
- Cheap, reliable, and widely available on the used market
- Capable enough for Kubernetes workloads without enterprise spending
- Easy to find replacement parts if something fails
Networking
I’m keeping the network simple: a basic gigabit switch and proper Cat6 cabling. No VLANs, no managed switch complexity. Just repeatability and low friction.
| Item | Cost |
|---|---|
| TP-Link 8-Port Gigabit Switch (TL-SG108, renewed) | $17.99 |
| Cat6 patch cables (6 ft, 10 pack) | $12.99 |
| Cat6 Ethernet cable (35 ft) | $19.94 |
| Total | $50.92 |
Why unmanaged gigabit?
- Plug and play, zero configuration
- No time wasted on switch setup while I’m still learning fundamentals
- 8 ports covers 3 nodes, uplink, and room for expansion
Total cost
Here’s what the full 3-node homelab costs:
| Category | Cost |
|---|---|
| Compute (3 × $105) | $315.00 |
| Networking | $50.92 |
| Grand Total | $365.92 |
With shared infrastructure factored in, that’s roughly $122 per node for a real multi-node Kubernetes lab.
Physical setup
A homelab can quickly become a mess of unlabeled boxes, tangled cables, and forgotten configurations. I’m applying basic discipline from day one to avoid that.
Labeling. Each node has a clear label. This sounds trivial, but it prevents mistakes during cluster work, upgrades, and troubleshooting. When you’re SSH’d into three similar machines, labels matter.
Cabling. Short patch cables keep the switch area clean. One longer cable gives flexibility for router placement. Every cable is traceable at a glance.
Layout. The lab is arranged so nodes are accessible, airflow isn’t blocked, and my operator machine sits naturally as the control point. This isn’t about aesthetics. It reduces troubleshooting time and makes iteration faster.
The plan
I’m approaching this in two phases:
Phase 1 (now): Run K3s on a single node for focus and speed. Break and fix things without the complexity of multi-node coordination.
Phase 2 (later): Bring up all three machines as a proper cluster and upgrade RAM to 32GB per node for heavier workloads.
This series will follow that progression:
- Part 2: OS installation and baseline node prep (users, SSH, time sync, swap)
- Part 3: K3s on the first node with remote kubectl access
- Part 4: Ingress and service exposure
- Part 5: Storage and backup basics
- Part 6: Observability stack
Wrapping up
I’m building this lab to be useful long-term: simple now, expandable later, and structured enough to treat like a real environment rather than a toy.
If you’re building your own Kubernetes homelab, feel free to adapt this approach to your constraints. Budget, space, noise, power, and learning goals will all shape what makes sense for you.
Comments